
How to Install Consent Mode V2 (with GTM and Cookiebot)
Google’s Consent Mode V2 has become essential for businesses operating in regions with strict privacy regulations. This enhanced framework allows you to respect user privacy choices while maintaining valuable analytics data for your website. If you’re using Google Tag Manager (GTM) and Cookiebot together, you’re in the right place to learn how to implement this powerful combination: Install Consent Mode V2.
This guide walks you through the complete setup process for Google Consent Mode V2 using GTM and Cookiebot. You’ll discover how to configure privacy settings, implement advanced consent mode v2 features, and ensure your GA4 consent tracking works seamlessly. Whether you’re new to consent management or upgrading from the previous version, these step-by-step instructions will help you maintain compliance while preserving data quality.
Understanding Consent Mode V2 and Its Benefits
Google Consent Mode V2 introduces two additional consent parameters that enhance privacy compliance and data collection. The original consent mode included analytics_storage and ad_storage, while V2 adds ad_user_data and ad_personalization parameters Install Consent Mode V2.
These new parameters provide granular control over how Google processes user data. The ad_user_data parameter governs whether user data can be sent to Google for advertising purposes, while ad_personalization controls whether data can be used for remarketing and personalized advertising.
Advanced consent mode v2 offers a significant advantage: it can model user behavior even when users decline certain cookies. This modeling helps preserve data insights while respecting privacy choices, making it particularly valuable for businesses that rely on analytics for decision-making.
Prerequisites for Installation
Before diving into the installation process, ensure you have the necessary access and tools ready. You’ll need administrative access to your Google Tag Manager account and your Cookiebot account. Your website should already have GTM installed with the container snippet properly placed in your site’s code.
Verify that your GA4 property is properly configured and receiving data through GTM. If you’re using other Google services like Google Ads or Google Analytics, make sure those tags are also managed through GTM for consistent consent handling.
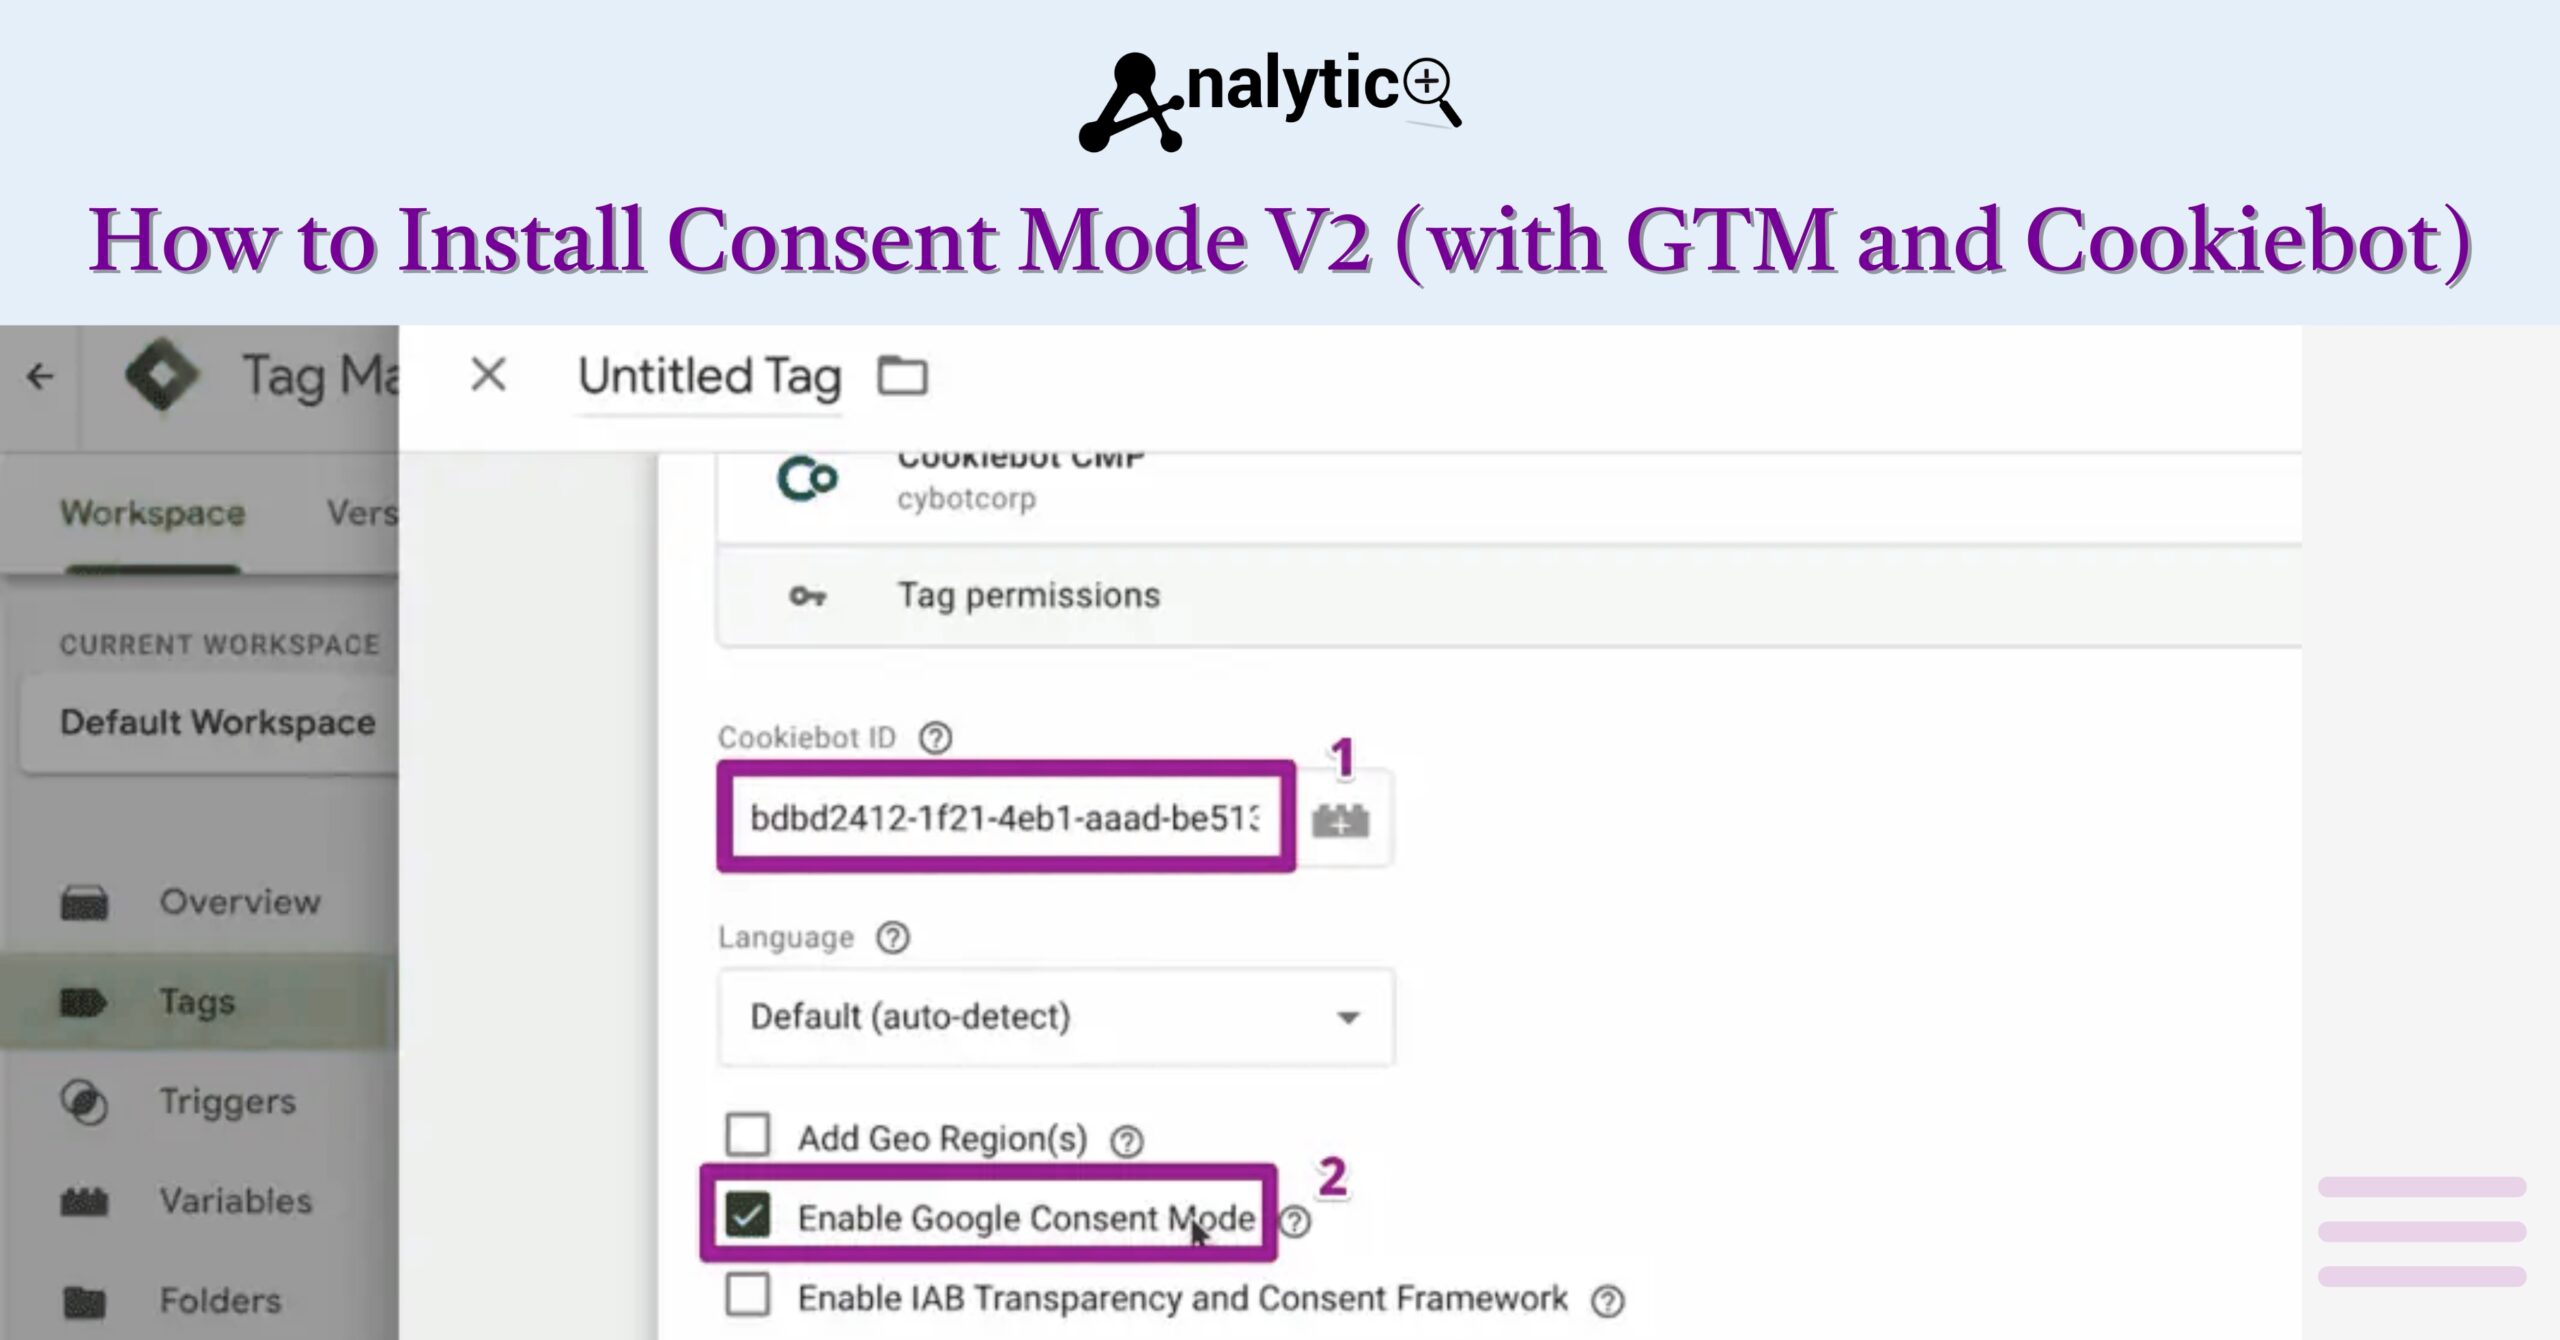
Setting Up Cookiebot for Consent Mode
Start by configuring your Cookiebot settings to work with Google Consent Mode V2. Log in to your Cookiebot account and navigate to your domain settings. Look for the “Google Consent Mode” section and enable the integration.
Within Cookiebot’s interface, you’ll find options to map different cookie categories to consent mode parameters. Map your “Statistics” category to analytics_storage, “Marketing” to ad_storage, and configure the new V2 parameters accordingly. Enable ad_user_data and ad_personalization mapping to ensure complete coverage.
Configure the consent banner to present clear choices to users. Cookiebot’s auto-blocking feature should be enabled to automatically block scripts based on user consent choices. This ensures that tracking codes only fire when users have provided appropriate consent, Install Consent Mode V2.
Configuring Google Tag Manager
Open your Google Tag Manager container and create a new tag for the Consent Mode initialization. Choose “Custom HTML” as the tag type and add the consent mode configuration script. This script should define the default consent states for all parameters before any other tags fire.
Set up the consent update mechanism by creating triggers that respond to Cookiebot’s consent events. These triggers will update consent states when users make choices in your consent banner. Create separate triggers for consent granted, consent denied, and consent updated scenarios.
Configure your GA4 configuration tag to respect consent mode settings. Ensure that the GA4 consent parameters are properly mapped and that the tag fires only after consent has been established. This setup enables proper data collection while maintaining compliance.
Implementing URL Passthrough Consent Mode
URL passthrough consent mode helps maintain user attribution when users navigate between pages or domains while ads personalization consent is denied. This feature appends campaign information to URLs, preserving attribution data even without personalization cookies.
Enable URL passthrough by adding the url_passthrough: true parameter to your consent mode configuration. This setting works automatically once enabled, appending necessary campaign information to outbound links when users haven’t consented to ad personalization.
Test the URL passthrough functionality by navigating through your site with different consent configurations. You should see additional URL parameters when personalization consent is denied, indicating that the feature is working correctly.
Testing Your Implementation
Thorough testing ensures your consent mode v2 setup functions correctly across different scenarios. Use Google Tag Manager’s preview mode to test various consent states. Check that tags fire appropriately when consent is granted and remain blocked when consent is denied. Install Consent Mode V2.
Test the consent banner functionality by clearing your cookies and revisiting your site. Verify that the banner appears correctly and that your consent choices are properly recorded. Use browser developer tools to monitor network requests and confirm that tracking codes respect consent decisions.
Validate your setup using Google’s Tag Assistant or similar debugging tools. These tools can identify implementation issues and confirm that consent signals are being transmitted correctly to Google’s servers.
Monitoring and Maintaining Your Setup
Regular monitoring helps ensure your consent mode implementation continues working correctly. Set up alerts in Google Analytics to track consent rates and identify any unusual patterns in user behavior or data collection.
Review your consent mode configuration periodically, especially when making changes to your website or adding new tracking tools. Updates to privacy regulations may also require adjustments to your consent management approach.
Keep your Cookiebot and GTM configurations synchronized. When adding new tags or modifying existing ones, ensure they’re properly configured to respect consent mode settings. Document your setup to help future maintenance and troubleshooting efforts.
Troubleshooting Common Issues
If consent mode signals aren’t being received correctly, check your tag firing sequence. The consent mode initialization must occur before any other tracking tags attempt to load. Adjust tag priorities if necessary to ensure proper execution order.
Banner display issues often stem from conflicts between Cookiebot’s script and other website elements. Check for JavaScript errors in your browser console and resolve any conflicts that might prevent the consent banner from appearing correctly.
Data discrepancies between consented and non-consented users are normal due to the consent mode’s modeling behavior. However, significant discrepancies might indicate configuration issues that require investigation and adjustment.
Maximizing the Benefits of Your Implementation
With consent mode V2 properly implemented, you can leverage advanced privacy settings while maintaining valuable insights. Use GA4’s consent reporting features to understand how consent choices impact your data collection and adjust your privacy strategy accordingly.
Consider implementing enhanced e-commerce tracking with consent mode to maintain conversion attribution even when some users decline certain cookies. This approach helps preserve important business metrics while respecting user privacy preferences.
Regular analysis of your consent data can reveal insights about user preferences and help optimize your consent banner messaging. Users who understand the value of sharing their data are more likely to provide consent, improving your overall data quality.