
Complete Google Analytics 4 Setup with Google Tag Manager
Setting up Google Analytics 4 (GA4) through Google Tag Manager might seem complex, but it’s one of the most powerful ways to track your website’s performance. This comprehensive guide will walk you through the entire GA4 setup process, from initial configuration to advanced event tracking, ensuring you capture the data that matters most for your business.
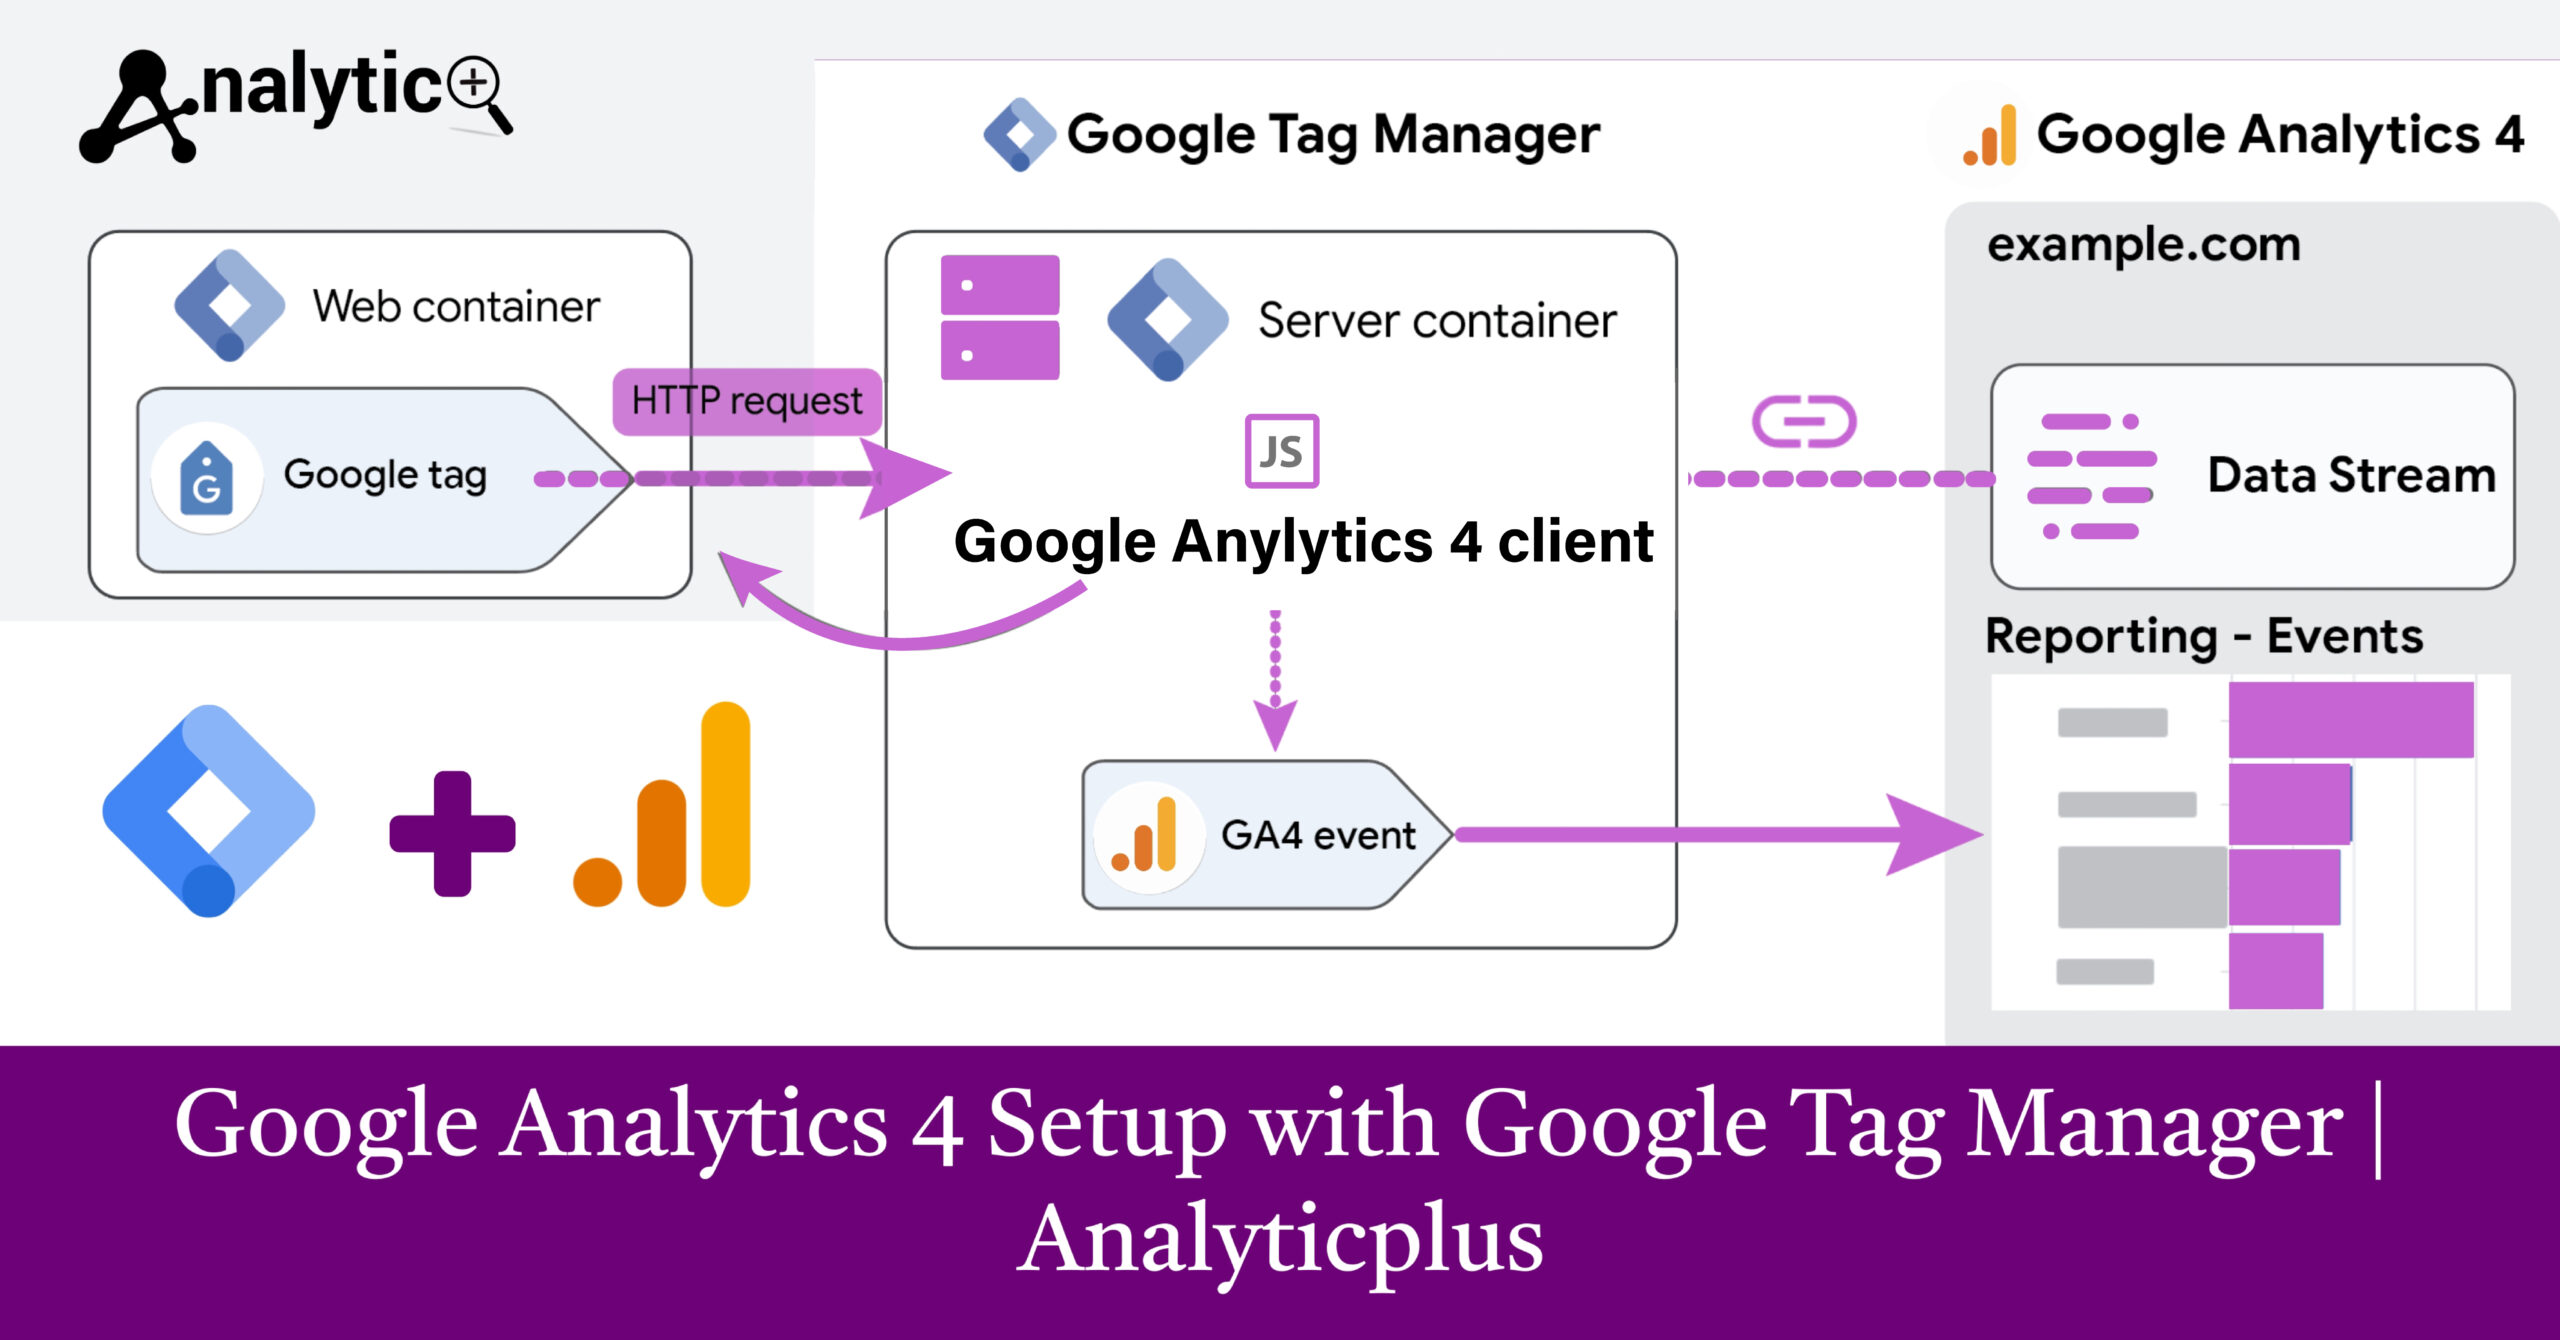
Unlike the traditional direct installation method, using Google Tag Manager for your GA4 setup offers greater flexibility and control over your tracking implementation. You’ll be able to manage multiple tags, set up custom events, and troubleshoot issues more effectively—all without constantly editing your website’s code.
By the end of this tutorial, you’ll have a fully functional Google Analytics 4 installation that tracks user interactions, provides valuable insights, and helps you make data-driven decisions for your website.
Why Use Google Tag Manager for GA4?
Google Tag Manager (GTM) acts as a central hub for all your website tracking codes. Instead of hardcoding analytics scripts directly into your website, GTM allows you to manage everything from one dashboard. This approach offers several advantages for GA4 implementation:
Simplified Management: All your tracking codes live in one place, making updates and modifications straightforward. You can add, edit, or remove tags without touching your website’s source code.
Enhanced Debugging: Google Tag Manager includes built-in preview mode and debugging tools that make it easier to test your GA4 configuration before going live.
Advanced Event Tracking: Setting up custom events and conversions becomes much more manageable through GTM’s user-friendly interface.
Better Performance: GTM loads asynchronously, which means your tracking codes won’t slow down your website’s loading speed.
Prerequisites and Account Setup
Before diving into the GA4 setup process, you’ll need to prepare a few essential accounts and gather some basic information.
First, create or access your Google Analytics account and set up a new GA4 property. During this process, you’ll receive a unique Measurement ID (formatted as G-XXXXXXXXXX), which you’ll use later in the Tag Manager configuration.
Next, set up your Google Tag Manager account if you haven’t already. Create a new container for your website and install the GTM container code on every page of your site. This involves adding two code snippets: one in the <head> section and another immediately after the opening <body> tag.
Make sure you have administrative access to both accounts, as you’ll need to create and modify configurations in both platforms.
Creating Your GA4 Configuration Tag
The GA4 Configuration tag serves as the foundation for all Google Analytics 4 tracking on your website. This tag initializes the analytics library and establishes the connection between your site and your GA4 property.
In Google Tag Manager, navigate to Tags and create a new tag. Select “Google Analytics: GA4 Configuration” as your tag type. Enter your GA4 Measurement ID in the designated field—this is the G-XXXXXXXXXX identifier from your Analytics account.
For the trigger, select “All Pages” to ensure GA4 tracks every page view on your website. This basic setup captures essential metrics like page views, sessions, and user demographics automatically.
Consider adding configuration parameters to enhance your tracking. Common parameters include custom dimensions, content groupings, or specific user properties that align with your business objectives.
Setting Up Basic Event Tracking
Google Analytics 4 relies heavily on events to track user interactions. While GA4 automatically captures some events like page views and scrolls, you’ll likely want to track additional interactions specific to your website.
Common events to implement include form submissions, button clicks, file downloads, and external link clicks. Each event requires its own GA4 Event tag in Google Tag Manager.
Create a new tag and select “Google Analytics: GA4 Event” as the tag type. Link this tag to your GA4 Configuration tag using the Configuration Tag setting. Define your event name and any relevant parameters that provide context about the user action.
Set up appropriate triggers for each event. For example, a form submission event might use a “Form Submission” trigger, while a download event could use a “Click” trigger with specific conditions for file types.
Advanced Configuration Options
Once your basic GA4 setup is working correctly, explore advanced configuration options to unlock more detailed insights about your website performance.
Enhanced Ecommerce Tracking: If you run an online store, implement ecommerce events like purchases, add-to-cart actions, and product views. These events provide crucial data for understanding your sales funnel and customer behavior.
Custom Dimensions and Metrics: Define custom dimensions that capture business-specific data points. These might include user types, content categories, or subscription levels that help segment your audience more effectively.
Cross-Domain Tracking: For websites spanning multiple domains, configure cross-domain tracking to maintain user sessions across different properties.
Data Streams Configuration: Fine-tune your data stream settings in GA4 to control data retention, user deletion, and privacy controls according to your compliance requirements.
Troubleshooting Common Issues
Even with careful setup, you might encounter issues with your GA4 implementation. Understanding common problems and their solutions will help you maintain accurate tracking.
Google Analytics GA4 Configuration Missing: This error typically occurs when the GA4 Configuration tag isn’t firing correctly. Use Google Tag Assistant to verify that your configuration tag loads on all pages and check your trigger settings.
Duplicate Data: If you’re seeing inflated numbers, you might have multiple GA4 tags firing simultaneously. Review your tag configuration and ensure you’re not mixing direct GA4 installation with Tag Manager implementation.
Events Not Tracking: Missing events usually indicate trigger problems or incorrect event naming. Use GTM’s preview mode to test event firing and verify that your trigger conditions match actual user behavior.
Data Processing Delays: Remember that GA4 data isn’t real-time. Standard reports may take 24-48 hours to reflect new data, so be patient when testing your implementation.
Testing and Validation
Proper testing ensures your GA4 setup captures accurate data from day one. Google provides several tools to validate your implementation before making it live.
Use Google Tag Assistant to verify that your tags fire correctly across different pages and scenarios. This browser extension shows you exactly which tags load and identifies potential configuration issues.
Enable Google Tag Manager’s preview mode to test your setup in a safe environment. This feature allows you to see tag firing in real-time without affecting your live analytics data.
Check the Realtime reports in Google Analytics 4 to confirm that your basic tracking works correctly. While detailed reports take time to process, Realtime data should appear immediately if your configuration is working properly.
Document your event tracking setup and create a testing checklist for future reference. This documentation becomes invaluable when troubleshooting issues or onboarding new team members.
Maximizing Your GA4 Investment
Setting up Google Analytics 4 through Google Tag Manager opens the door to sophisticated website analytics that drive better business decisions. Your implementation provides the foundation for understanding user behavior, optimizing conversion paths, and measuring the effectiveness of your digital marketing efforts.
Regular maintenance keeps your tracking accurate and relevant. Schedule periodic reviews of your event tracking, update custom dimensions as your business evolves, and stay current with new GA4 features that Google continues to release.
Consider expanding your analytics setup with additional Google tools like Google Optimize for testing or Google Data Studio for advanced reporting. The Tag Manager foundation you’ve built makes integrating these tools straightforward.
Start exploring your GA4 data today, but remember that meaningful insights develop over time as your data matures and you become more familiar with GA4’s reporting interface.